
Most ARs these days already have a telestock, but many aren’t properly assembled. Here’s how to do it right.
One of the things that we find very important in the LE Patrol rifle classes is getting rifles to fit officers. While no one would consider for a moment the idea that the standard and only issue shoe should be a size 9, the uniform jacket a 38 Regular and trousers 30L-32W, management blithely assumes that one pistol will fit them all. And one rifle, as well.
Well … no.
So, in the early days, we saw officers arrive with fixed stocks, and they’d look enviously at the one or two who had telestocks. Now, it’s rare to see a fixed stock, they’re all telestocks. And yet, not all are properly assembled. Or even tightly assembled.
The telestock has a buffer tube, a sliding stock with some sort of latch, and the tube is secured to the lower receiver by being screwed in and then locked in place with what’s called a castle nut. It also holds on to the rear plate that guides the buffer tube and holds in the takedown spring and plunger.

Here’s a quick primer on how to take a telestock apart—not doing it correctly can damage parts:
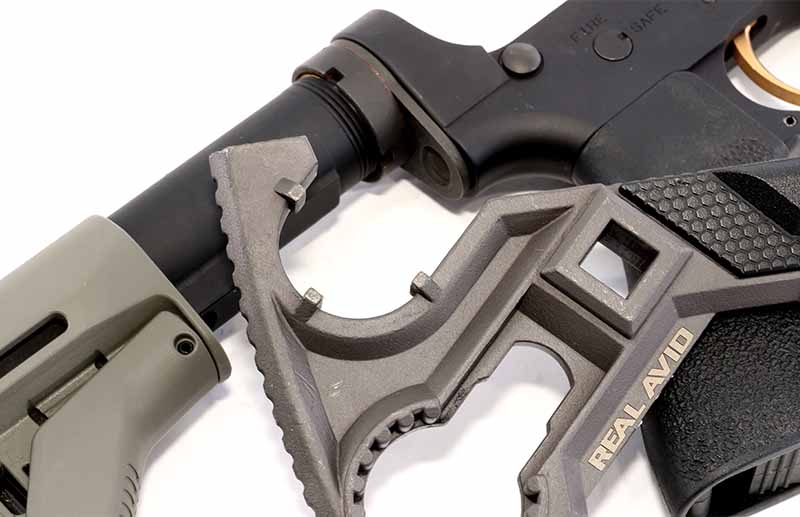
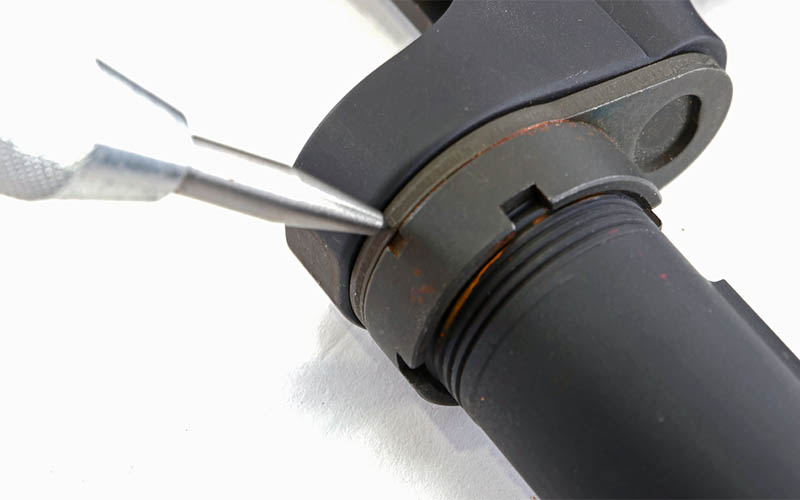
Unload and disassemble, removing the upper and lower. Remove the buffer and spring. Use a castle nut wrench to loosen the castle nut, and then spin it back far enough to clear the retaining plate. Slide the retaining plate back from the receiver, and control, remove and set aside the takedown spring. You can, if you wish, now remove the buffer tube by unscrewing it. Once it goes back a turn or two, the buffer retainer and its spring will pop loose, so control those and set them aside.
Doesn’t sound so bad, right?
Well, we can now get to the mistakes, errors and dimensional problems that crop up.
Buffer Tube
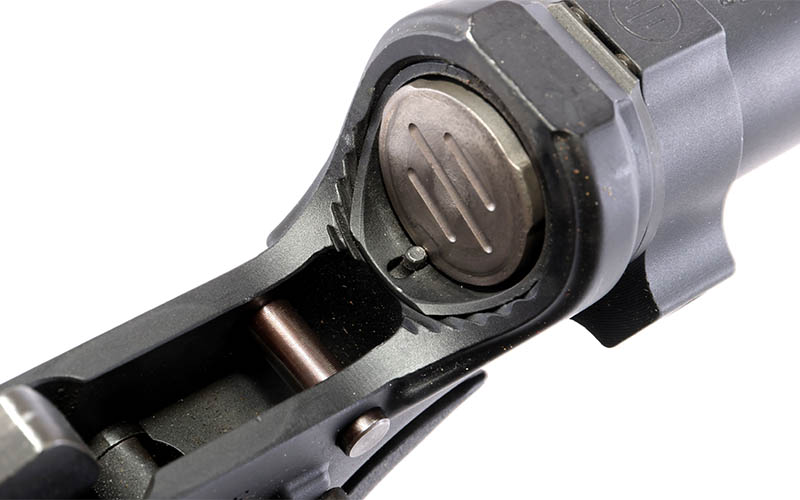
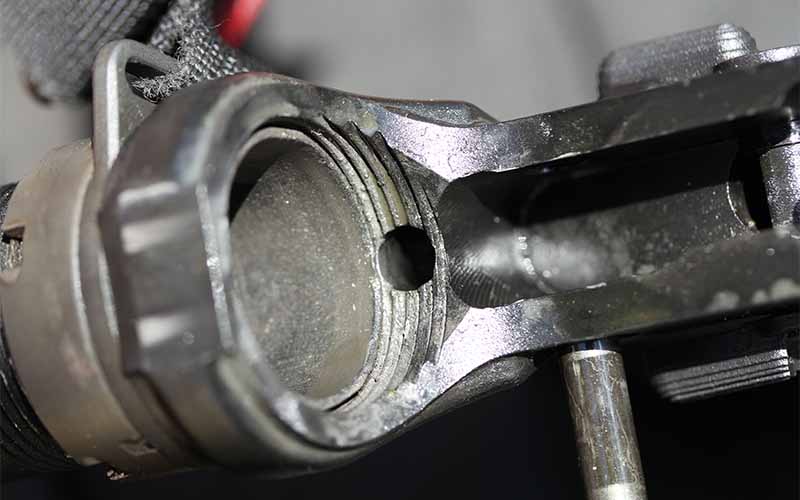
The buffer tube has to be screwed into the lower receiver hoop far enough to trap the buffer retainer, but not so far that it binds the retainer down in its tunnel. If not screwed in far enough, the buffer retainer pops out, and it and its spring get to dance with the hammer, trigger or disconnector. Soon the rifle stops working. Install it in too far, and the retainer gets bound down and doesn’t keep the buffer under control. When you open the action to disassemble for cleaning, you get a spring-launched buffer flying across the room. (Or it hits someone, who rightly objects to such treatment.)
The solution is to check the engagement. If the engagement is minimal, you can remove the buffer and spring, loosen the castle nut, turn the buffer tube in another rotation, and tighten everything back down again. If your rifle has the hoop threads cut wrong, then you’ll have to either swap tubes until you find one that works or file the lip of the tube you have to fit properly. Screw it in until it holds the retainer down. See how much too much you have (and it may even stick out of the top of the hoop as well), then remove the tube and carefully file the lip back until it’s just right.
You might even end up with an uneven—or lipped—tube, with clearance on the top for the upper receiver, and enough protrusion on the bottom to hold in the retainer.
Or you can buy a buffer tube that’s been built to provide a retaining lip and still clear the upper. PWS makes one, and it works like a champ.
Tipped buffer tubes are those that have been allowed to move when the castle nut has been tightened. The tube, and the stock attached to it, needs to be vertical to the bore axis, or else it will be uncomfortable or difficult to shoot. The trick here is keeping the tube vertical while you tighten the castle nut. There’s no trick, just patience.
Castle Nut
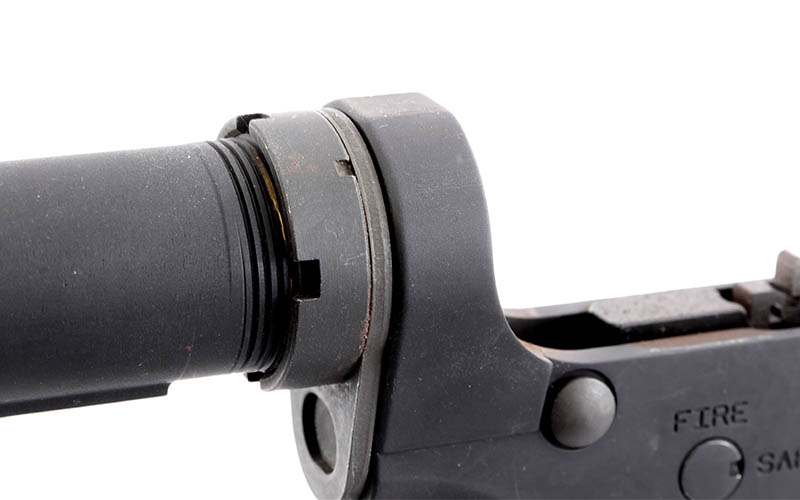
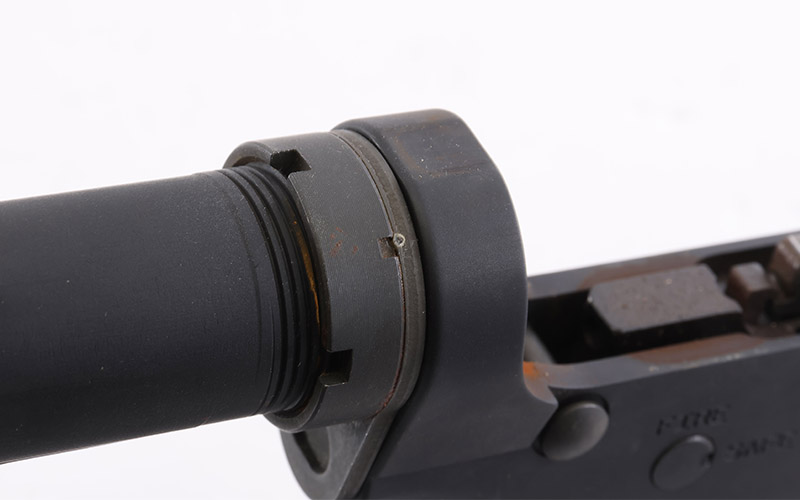
The castle nut has notches in its front and rear edges. The big notches are for the wrench that tightens or loosens it, and the small notches are for staking. The big notches go to the rear. No, I’m not kidding: I’ve seen castle nuts put on the wrong way, in part because they’re sometimes screwed on to the buffer tube (as a parts kit) at the factory just to keep them from being lost and end up being screwed on wrong. The castle nut must be torqued on with a proper wrench. (Anything else will either not provide enough torque or mar the castle nut heinously.) You can use Loctite, but this is more a vibration control, and a belt-and-suspenders approach. Don’t depend solely on torque and Loctite.
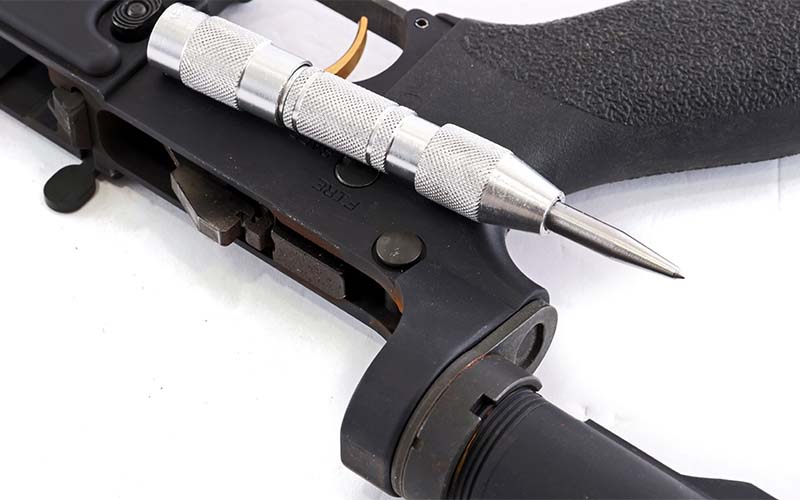
The castle nut has to trap the retaining plate flat against the receiver, and once in place you must stake the castle nut. That’s what the smaller notches are for. Use a spring-loaded center-punch and put the tip against the retaining plate, then close to the gap of the notch. You want to kick up a staked nib that’ll interfere with the castle nut unscrewing. You won’t do this with just one click, you’ll have to keep at it until the nib is big enough to do its job. An un-staked castle nut can loosen, and when it does, the stock gets all wobbly. If, on top of everything else, the buffer tube wasn’t screwed in far enough, it may loosen enough to free the buffer retainer, and when you go to disassemble to fix things, you get the buffer surprise. So be careful when you take the upper and lower apart—you don’t want to take a buffer in the face.
Another quick warning here; if you have opted for a single-point sling and are using a retaining plate with loops on it to clip the sling onto, you can’t stake it. For some reason beyond understanding, those plates are made too hard to be staked. This is the one time you will have to depend on torque and Loctite—at least until you decide to give up on single-point slings and can rebuild to a regular retaining plate. If you just have to have a single-point sling, then go with the GG&G adapter, one that clamps on. With it you don’t have to rebuild your telestock to use a single-point sling.

Castle Nut Torquing
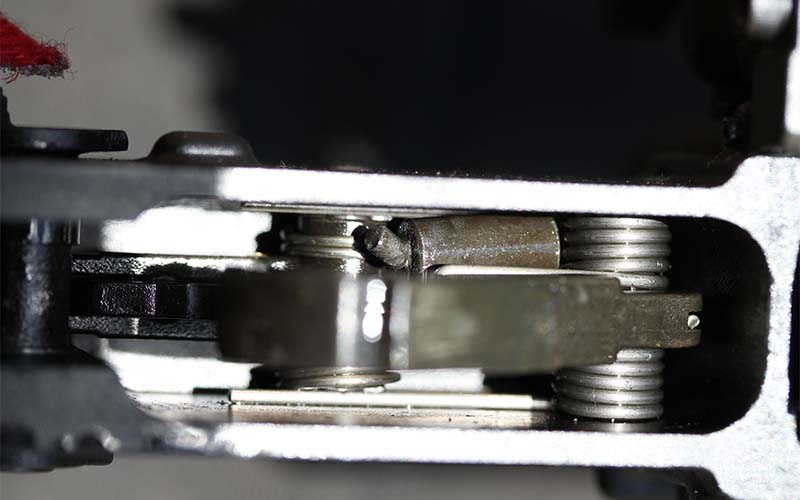
You might think that the vise block that fits into the magazine well is the way to hold your lower while working on the castle nut. No. That risks breaking things. Instead, lay the receiver flat on a padded bench. The pistol grip will act as your lock. When you go to loosen the nut, lay the lower receiver down on its right side. This way you will by rotating the castle nut toward the pistol grip. You can place a hand on the pistol grip and lean on it with your body weight, to keep things still. When tightening, lay it on the left side, so again, the pistol grip is in the direction you’re turning the nut. The Mil-spec limit is 40 ft-lb. That’s a lot for this, and all you need, but you still have to stake it.
And you use a padded bench because the various things that stick out, like the bolt latch, or the magazine button fence, would otherwise be pressed hard against the bench top.
Retaining Plate
If you look at the plate, you’ll see a dished section, and on the other side that section is raised. Plates are made by stamping them out of sheet steel, and part of the stamping is to create that raised portion. The raised portion fits into the recess machined in the lower receiver. It seems obvious but I’ve seen a couple of rifles that were assembled with the raised portion out. When that happens, the retaining plate can’t stay in place; it’ll rotate, and it’ll either take the buffer tube with it or it’ll gouge the buffer tube.
The plate also keeps the takedown spring in place. A quick look to make sure the spring was pushed fully into the tunnel on assembly is warranted. If it wasn’t, it can be bent, and the plate is tipped. Also, the spring might not have enough force to keep the plunger under control, and you might lose the rear plunger on disassembly.
Stock Swap
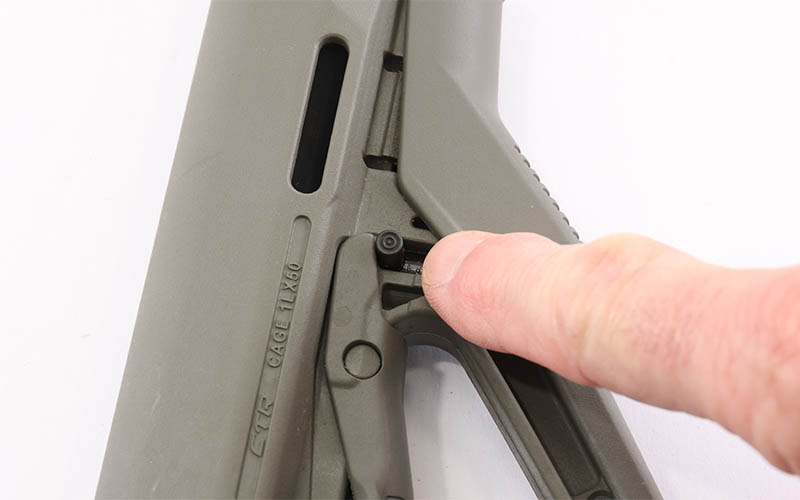
While this isn’t something done by Wall Street, exchange the sliding portion of the stock on the buffer tube for another one. The latch on the USGI style is a hinged lever that pulls the plunger out of the drilled locking spots. (The originals had two: open or closed. Only later did we get more, now you can get up to eight positions.) The locking plunger rides in a slot machined on the ventral fin of the buffer tube. The lever can’t move the plunger enough to permit it to leave the groove. So, to remove the slider, you have to grab the whole lever, pull it away from the slider and then slide the stock off. Install the new one the same way.
Mil-Spec Versus Commercial
The buffer tube isn’t the same for all stocks. Less so now than in the old days, there are “commercial” tubes that differ. The original-spec tubes are made from forgings, and the tube is machined. If you look closely at a mil-spec tube, you’ll see that the tops of the threads are higher than the tube body. The commercial tubes (assuming anyone makes them anymore, but you might still run into an older rifle with one) are made by extrusion.
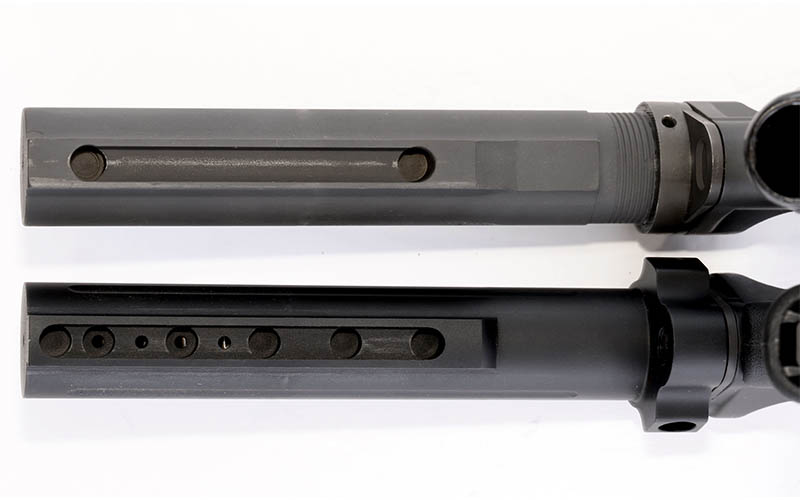
Here, a heated cylinder of aluminum is forced through a shaping die, and the tube is brought down to diameter while the ventral fin is formed. Then, the tube is threaded. The threads can’t be larger in diameter than the tube. (Well … they can, but that adds time, machinery and cost to their manufacture … so it ain’t happening.) And if you look at a commercial tube, the thread tops are the same diameter as the tube.
The threads are the same; they have to be to screw into the receiver. But the slider portion differs, and a mil-spec stock won’t fit onto a commercial tube, while a commercial stock will be a sloppy fit on a mil-spec tube. The easy way to determine? Measure it. Mil-spec tubes are a nominal 1.148 inches while commercial tubes are a nominal 1.168 inches in diameter. Either will fit a lower receiver, but they won’t permit stock swaps without tube swaps. Both use the same springs and buffer weights. Most tubes, and thus stocks, are now the mil-spec diameter. If yours has a commercial-diameter buffer tube, and you want a different slider, you’ll probably find it easier to just rebuild the whole assembly with a new mil-spec tube, to get the stock you want.
Editor’s Note: This article originally appeared in the December 2023 issue of Gun Digest the Magazine.
Get On Target With The AR:

Next Step: Get your FREE Printable Target Pack
Enhance your shooting precision with our 62 MOA Targets, perfect for rifles and handguns. Crafted in collaboration with Storm Tactical for accuracy and versatility.
Subscribe to the Gun Digest email newsletter and get your downloadable target pack sent straight to your inbox. Stay updated with the latest firearms info in the industry.